Zamp for QuickBooks Online: Getting Started & Installation
Before You Begin
- QuickBooks Online
- Simple Start, Essentials, Plus, Advanced, or Accountant
- A Zamp account & Zamp API Token
Installation Steps
- Install the Zamp Tax App for QuickBooks Online from the QuickBooks Online marketplace.
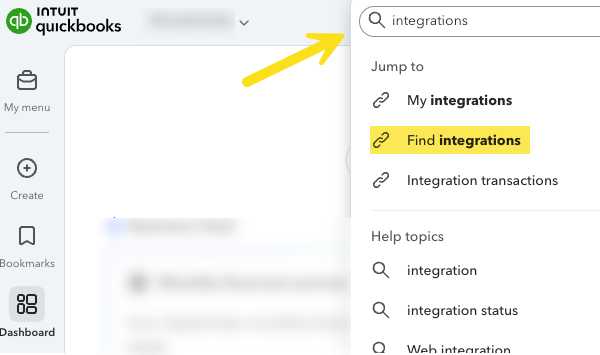
- If you're using the new, modernized QuickBooks Online view or user interface, the Zamp Tax app can be found by going to Search (at the top of the page) —> Find Integrations —> searching for "Zamp".
- This new QuickBooks Online view looks like this:
-
- Within the older QuickBooks Online view or user interface, navigate to Apps —> Find Apps —> Search —> type in 'Zamp' or click this link —> click the green 'Get app now' button.
- Navigate to My integrations through the search bar, or through the icon at the top right of the screen
-
- Select Launch under Zamp Tax. You will be authenticated and taken to the Zamp Tax app's configurations and settings page.
-
- Under the Zamp Tax Settings, configure the following:
- Zamp API Token - This value can be found in your Zamp account under the Integrations navigation menu or provided by your Zamp Onboarding manager.
- Allow Zamp to handle tax calculations - Enable this option to have Zamp handle sales tax calculations for your invoices, recurring invoices, and sales receipts.
- Sync transactions with Zamp - Enable this option to send your invoices, recurring invoices, credit memos, and sales receipts automatically to Zamp for sales tax filing purposes.
- Retain Zamp logs for 30 days - Enable this option to keep your logs (under the Logs navigation item) saved for 30 days. This can be helpful for our support team should you have questions.
- Enable transaction sync recalculation - This determines if you would like Zamp to recalculate taxes on your historical transactions. This is an optional setting.
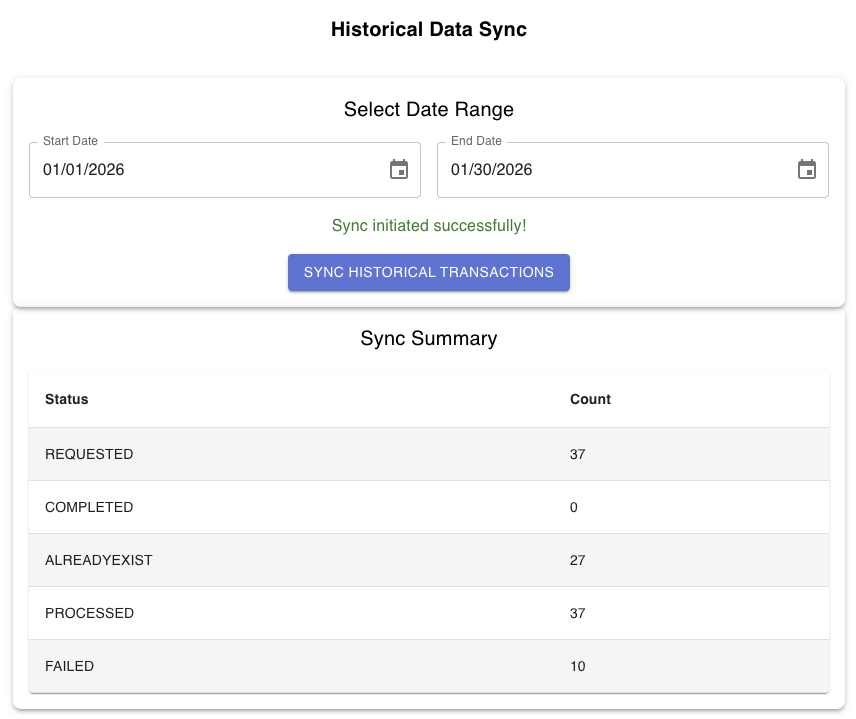
- Under Historical Data Sync, you have the option to transmit sales records by a Start Date and an End Date to your Zamp account. This is important for filing both prior-period and present-period transactions.
-
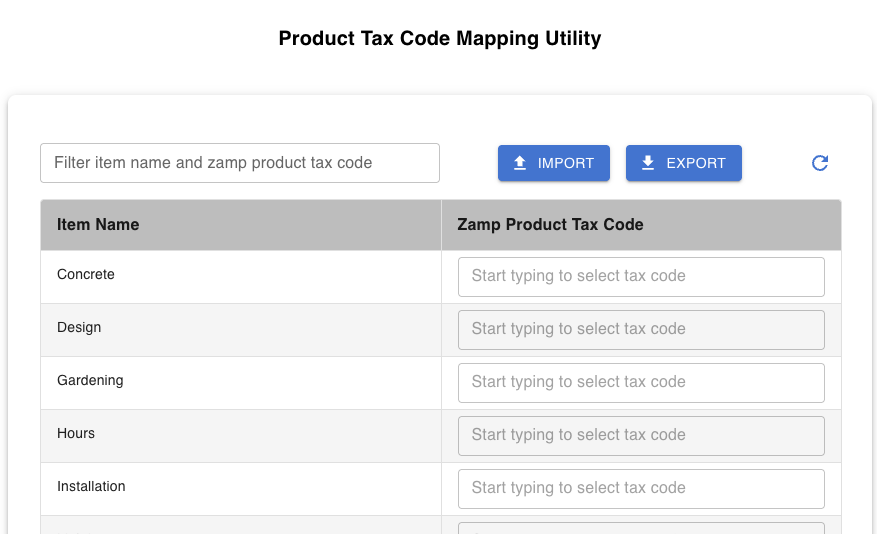
- Under Product Tax Code Mapping, use this section to map your items to Zamp Product Tax Codes if that is your preference. Determine if you are required to do this through this documentation.
-
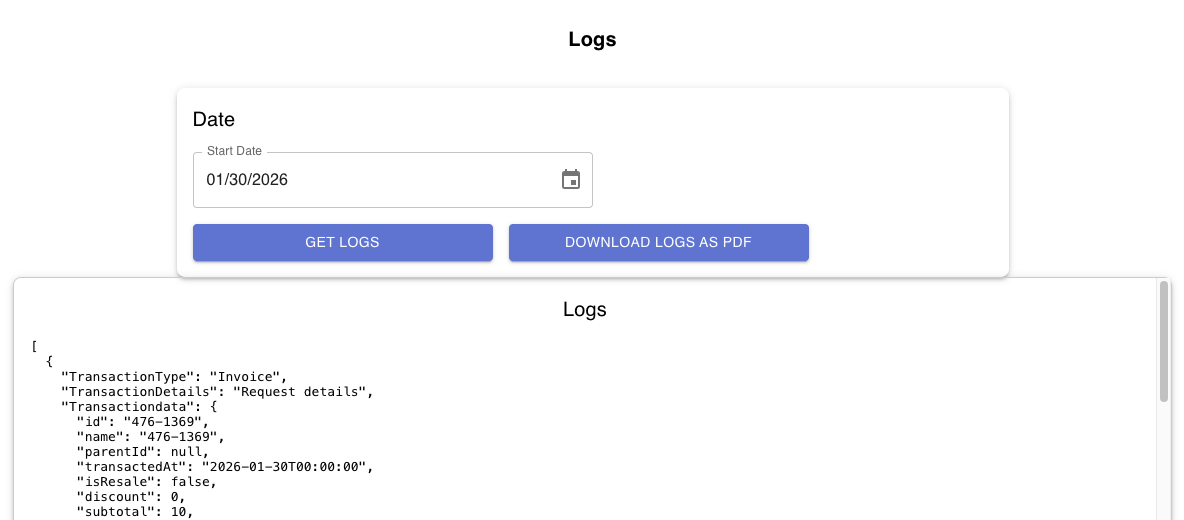
- To retrieve Logs, navigate to the Logs menu. Choose the date of the API activity you would like to review. Supply these logs to our Support or Engineering teams if you ever have questions around sales tax calculations or transaction history.
-


Note:
Zamp will create a Sales Tax Payable account within your Chart of Accounts during installation. If you are at the limit for your Quickbooks tier (Check Usage Limits here), installation will fail. Ensure you have at least one remaining spot for the Zamp account.
Want to learn more?
Are we potentially a good fit to support your organization's sales tax requirements? We are happy to answer any questions about the Quickbooks integration, and what we do at Zamp! You can find time with our team here, email us at sales@zamp.com, or call us at 1-866-438-9267.